Showing posts with label Projects. Show all posts

Monday, March 3, 2014

Regular Scarf to Infinity Scarf: Three Ways

Over the weekend, on a whim, I decided that I wanted to turn some of my regular scarves into infinity scarves, and I ended up doing it three different ways.

1) No-Sew Hem Adhesive
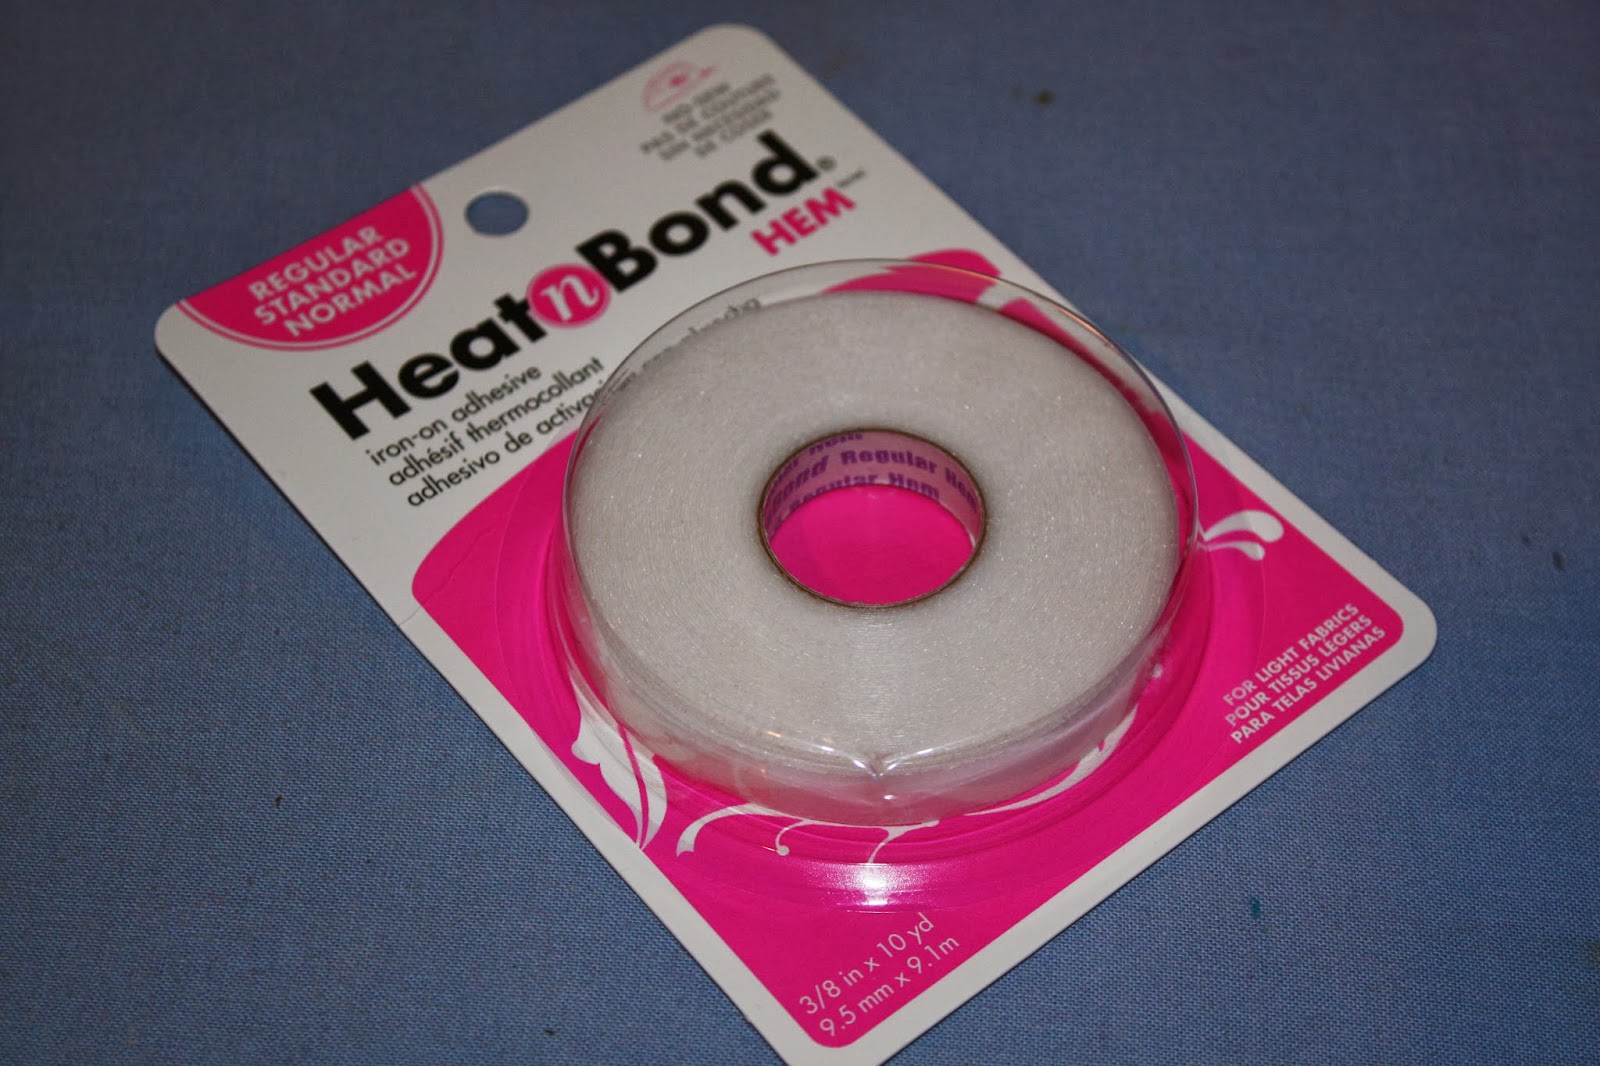
We were at JoAnn's so I picked up a roll of Heat N Bond for $2.99.  It's easy enough to use and I had no problem understanding the directions.  To get a "seamless" look, I made sure to attach the edges face to face, not overlapping.  While the directions were simple, I did have to turn the heat on the iron up higher than it said, and hold it on for much longer, to get a secure hold.
Verdict: I got frustrated that it wasn't working initially and I had to mess with it longer, but in the end it worked and would be a option for someone who didn't want to sew.


Beamer was on the couch and got to model the finished product.


2) Tying
The scarf that I used the no-sew adhesive on didn't have any tassels, but my other two scarves did.  My mom actually had the idea to just tie all of the tassels together.  It was tedious and took a little while, but I really like the end result.  I had thought I would just put the tied together part at the back, but I liked the "fringe."  I usually don't like fringe, but this was just enough to give it some visual interest.
Verdict:  Not the easiest or quickest, but it requires no other supplies and provides extra detail.


3) Sewing
I'm not a big sewer.  I take that back, I'm not a sewer at all.  That's why I bought the no-sew adhesive; my original plan was to do all of this needle and thread free.  After the frustrations with the adhesive though my mom suggested sewing it, and then she offered to do it :)  Not long after, scarf number three was all done!
Verdict:  Quick and easy if you've got the supplies and know how.


Tuesday, February 4, 2014

"Connected At The Heart" Gift

This post is long overdue, but I've been slightly preoccupied lately, what with the whole moving to another country in a few weeks thing happening.  But for Christmas this year I wanted all of my gifts to have an England theme to them.  Coming up with something for my mom, dad, and brother-in-law was  pretty easy but I had no idea what to get my sister.  Their spare bedroom has a travel theme to it and has a big map in it, and had been pinning lots of gifts idea that had to do with traveling, so I decided to go that route.

These pins were my inspiration:


via


And this was my final product:


I started by finding a map of Virginia in an atlas and tearing it out.  Then I printed off a map of Virginia from the computer, cut it out, and used it as a template to cut out Virginia from the map.  I made sure that Blacksburg was in a relatively accurate place on the map.


Next I found a picture of a map of England, one that had a similar look to the atlas map.  Then I printed it off and cut it out.  It wasn't until then that I realized I should have done that for Virginia too.  It would have been proportionate and would have saved a step of cutting.  Oh well, you live and learn!

I laid the two maps out on a piece of card stock, and then I started looking for a quote I wanted to use.  I found the one I used on Pinterest, and then I practiced writing it several different ways until I came up with an arrangement I liked.  I wrote it in pencil first and then went over it in Sharpie.


The final step was drawing red hearts around the cities of Blacksburg and Birmingham, and then connecting the two with a dotted line that formed a heart.


Monday, January 14, 2013

DIY "Sweet Treat" Plates

As mentioned in December, I made/decorated all of my Christmas gifts for friends this year.  My girls in Johnson City got monogrammed mugs, and for my friends from home, I decorated plates for them to put snacks and desserts - sweet treats - on.  I wanted to find plates that had a wide rim or edge on it, and I found fun colorful ones at Target for about $5 a piece!

As always, I typed up sweet treats in Word and found a cute font, this one was called Love Letters, downloaded from dafont.com.  Then I used a black medium point Sharpie paint marker to write sweets treats all around the rim of the plate.  One great thing about swirly, curly fonts like this is that if you mess up a little bit you can't really tell!  Every time I wrote it, it looked different than the time before, but you don't notice.  I signed the back of the plates and then baked them in the oven for 30 minutes for 350.*  I loved how they turned out, and I kind of want to make one for myself now!


Wednesday, December 26, 2012

DIY Monogram Mugs

My Christmas gifts for friends this year were all personalized, and my girls in Johnson City got mugs with their monograms on them.  As with most things that I decorate free-handed, I typed it up in Word and then found a font that I liked.  This one is called KG Eyes Wide Open.


Then I very nervously started painting*.  I just started with one thin stroke for each letter, and then went back with a thicker brush and kept adding to it until I got it to my liking.  After I was done painting I "baked" them in the oven according to the directions on the paint bottle.


It took about ten minutes to paint each one, and since the mugs were inexpensive and I already had the paint, the results were easy, budget-friendly gifts that everyone loved!


* I used Folk Art Enamel Acrylic Paint.  This is the same paint I used to paint these personalized Mr. and Mrs. mugs as a wedding shower gift.


Friday, December 14, 2012

Christmas Cards - Present and Past

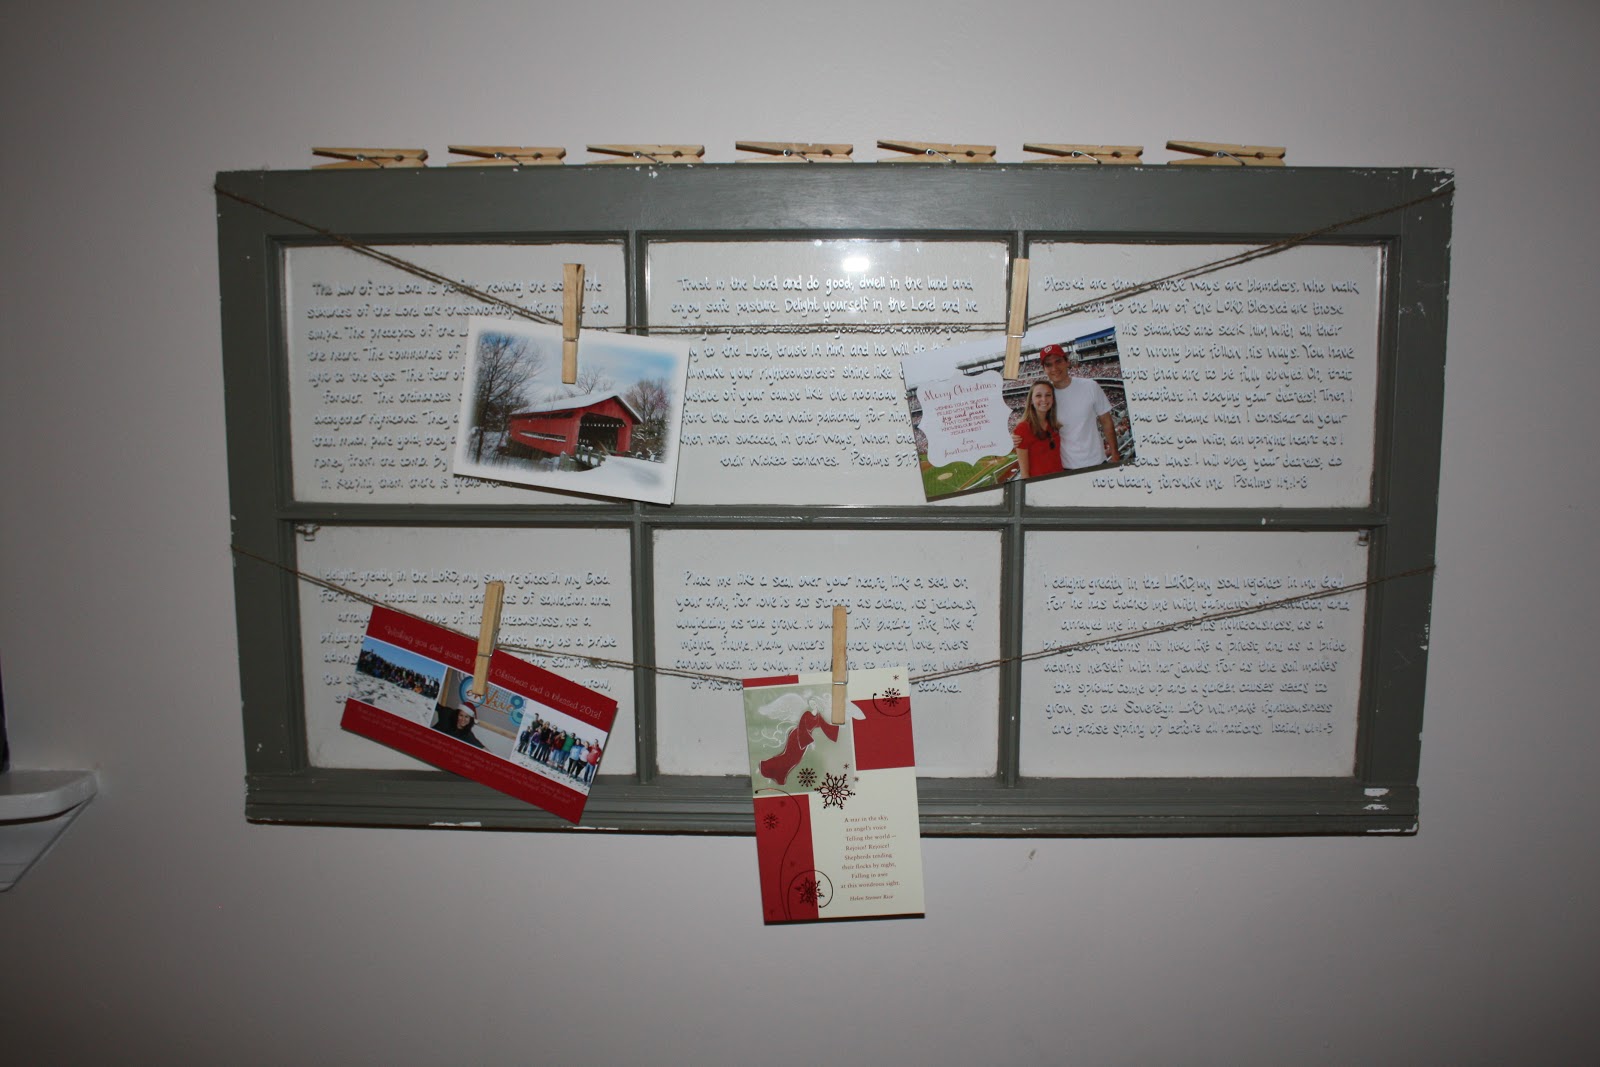
Since I've lived on my own, I've never found a way to display Christmas cards in a way that I like, until this year.  I looked at my green window one day, and it just came to me - attach two lengths of twine, and hang Christmas cards with clothes pins.  I sat down tonight and in about 15 minutes had it rigged up!  For the top piece, I just tied the twine around the two brackets used to hang it on the wall.  For the lower piece, I used two push pins on the outer-most edges and attached the twine to those.


Then I just hung the window back up and clipped up my Christmas cards.  I love how it turned out!  Very simple and Christmasy.

Since I took this picture I took all the extra clothes pins and put them in a little mason jar on the ledge between the kitchen and living room.


I also used a Pinterest idea to display Christmas cards from years past.  Over the years I've received many Christmas cards that include pictures, or are picture compilations themselves.  I love having them out during the season, but once they've been tucked away somewhere, they rarely see light again.  Not anymore though!  I pulled out all of the pictures, put them in order, punched holes in the corner, put them on a hinged ring, attached a bow, and set them out for all to see.  It's a great way to look back at pictures from year's past, and then at the end of this season I'll just add the new ones I've gotten.

A lovely little addition to the coffee table :)


Tuesday, August 21, 2012

DIY Wedding Decor

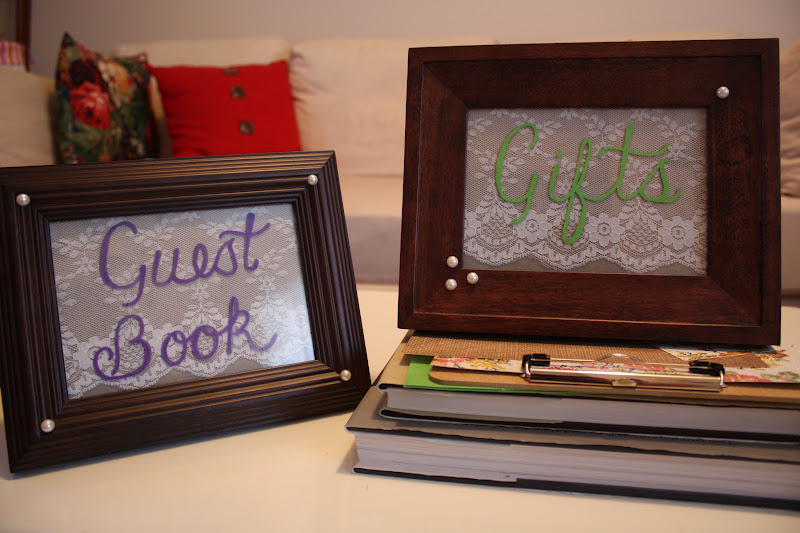
My sister was Matron of Honor at Emily and Dave's wedding last weekend, and she did a wonderful job with all of her MoH duties, but I had fun helping her out with one of them - making signs for the guest book and gifts.  Amanda had already come up with the idea, gathered the supplies, and started them, and then I got to finish them.  I'll start with the finished product, and then go back through the step-by-step process.


Step 1 - Glue the lace onto the cardboard.  I used Aleene's Tacky Glue, ya know, that stuff in the gold bottle.  This was just plain cardboard, like the kind you would find in the frame, but you could use any color background to coordinate with wedding/party colors.

You'll want the lace to be bigger than the cardboard, so you can wrap it around and glue it on the back.


Step 2 - Make a pattern.  There was no way I was going to write on the glass without something to trace.  So using Word, I typed up Guest Book and Gifts and tried out a bunch of different fonts until I found one I liked and knew I could duplicate.  Unfortunately I can't tell you which one I ended up using because I didn't save the document and I don't remember.  And I have a bazillion fonts in my font book because of work, it would take forever to go back through and figure it out.  Anyways,  I was doing this at home, where I don't have a printer, so I did just free-hand it onto a piece of paper and it took a few tries to get it right.


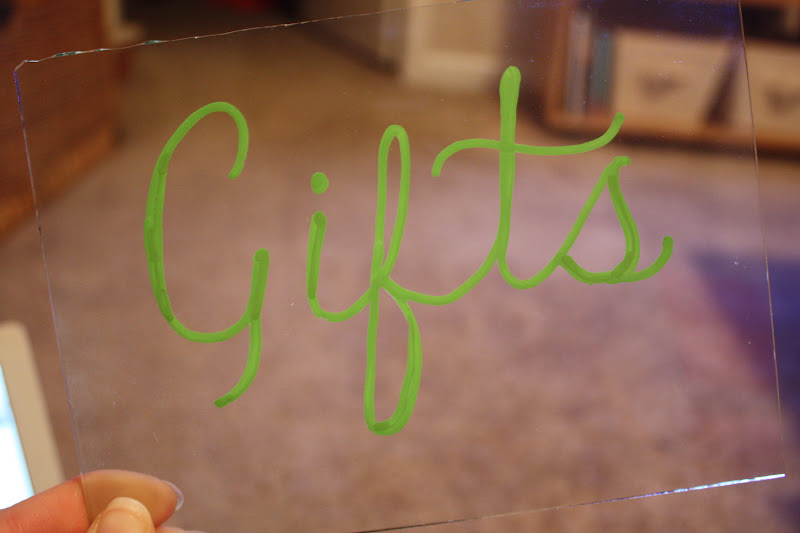
Step 3 - Trace it.  I cut out my pattern and taped it onto the glass to secure it before tracing, making sure both sides of glass were clean and smudge-free first!  I used two different brands of paint markers, both of of which I got at Michael's.


I had never used these brands before, and I actually liked the Sharpie brand better.  It gave a more solid stream of paint than the craftsmart one.  If you compare the pictures below you'll see how the green one is pretty continuous, but with the purple one you can tell where I picked up the marker and started new strokes.


Step 4 - Put it all together!  The easiest and best step of all!  The pearls were adhesive and Amanda had already put them on.  A few were coming loose though so I glued them on with some more Aleene's.  I didn't think to get a final final picture at the reception, so we'll just have to use the original one I posted.  Hopefully there will be one in the professional pictures! 


The lime green was a bit hard to read unfortunately.

And this picture is a tad blurry and has a glare :(

Tuesday, August 7, 2012

The Cover Up

I got another one of my summer goals done!  I replaced the vase and sticks that I was using to help cover up the breaker box with a painting I did; it's actually a quote I saw on Pinterest a while back that I liked.

So here's the dresser top and breaker box before:


And after!


I started with a blank canvas and painted it purple.


Then I typed the quote up on the computer until I had it formatted like I wanted, so I would have something to look at as I wrote it out.  I'm pretty good at looking at different fonts and free handing them, but I don't trust myself enough to do it with paint on the first try, so I penciled it first and then copied it with a paint marker.

It didn't turn out as good as I had hoped, because the letters and words aren't evenly spaced.  I had thought about printing the design on a transparency and using an overhead projector to copy it but decided against it, and learned my lesson.  Oh well, I definitely like it more than the vase and sticks!


My summer goals as they now remain:


Paint window in kitchen with crackle paint, and paint something on the glass.
Get something on the wall above the kitchen sink.
Paint little table next to wicker chest.
Paint coffee table white.
Varnish the end table.
Get something on bedroom walls.
Find something to replace vase and branches on dresser.
Put new fabric on director's chair.
Repaint red and green chest.
Paint earring holder white and then distress it.

And while there are still several projects to do, I've done a lot of things that weren't originally on the list, like: Painting a leaf dish, ModPodging a tray, Mr. and Mrs. mugs, and covering a clipboard.

Tuesday, July 31, 2012

Sprucing Up a Plain Clipboard

I recently decided that I needed wanted a clipboard to help keep all of my papers together when I'm planning/organizing/directing events.  And it couldn't just be a plain clipboard, needless to say it had to be cute.  I know I've seen cute clipboards, but of course when I want to buy one, I couldn't find any.  So I just decided to make my own.  

I bought a plain wooden clipboard from WalMart for $1.44 and covered it in two sheets of decorative paper from Michael's that were less than a dollar a piece.  Picking out decorative paper for projects like this always stresses me out, because there are so many options and I am indecisive.  I don't know how many different pieces of paper I picked up and considered, but I am very pleased with the ones I chose and how it turned out.

I didn't take any pictures of the process, because they would have been really boring and it was all self-explanatory anyways.  I started by tracing the shape of the clipboard onto the paper.  The paper wasn't as long as the clipboard, so I did have to add an additional little strip to cover the whole thing.  Then I rolled pieces of tape and taped the paper onto the clipboard in the corners, and then I covered the whole thing in clear contact paper.  I do have pictures of the finished product, and I can't wait to use it!


The front looks like burlap.


The back is a floral print.

This is a close-up of the pattern.  I love the newsprint behind the images.

Related Posts Plugin for WordPress, Blogger...