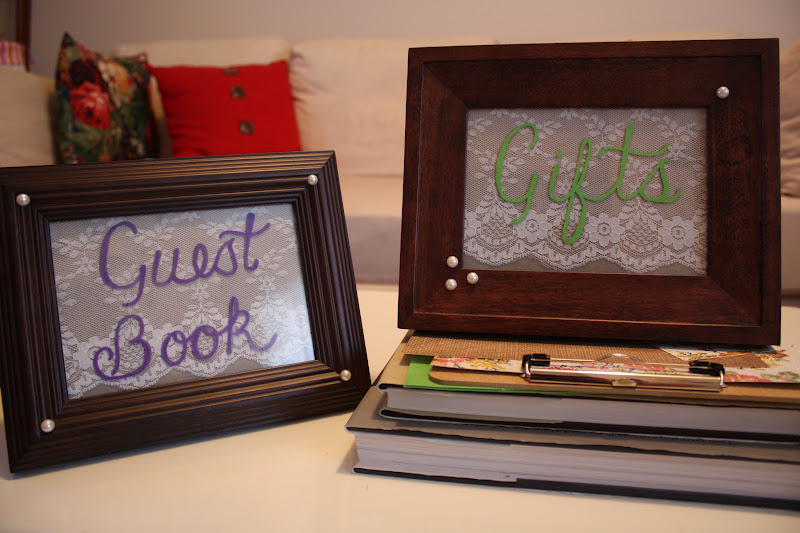
My sister was Matron of Honor at Emily and Dave's wedding last weekend, and she did a wonderful job with all of her MoH duties, but I had fun helping her out with one of them - making signs for the guest book and gifts. Amanda had already come up with the idea, gathered the supplies, and started them, and then I got to finish them. I'll start with the finished product, and then go back through the step-by-step process.
Step 1 - Glue the lace onto the cardboard. I used Aleene's Tacky Glue, ya know, that stuff in the gold bottle. This was just plain cardboard, like the kind you would find in the frame, but you could use any color background to coordinate with wedding/party colors.
 |
| You'll want the lace to be bigger than the cardboard, so you can wrap it around and glue it on the back. |

Step 2 - Make a pattern. There was no way I was going to write on the glass without something to trace. So using Word, I typed up Guest Book and Gifts and tried out a bunch of different fonts until I found one I liked and knew I could duplicate. Unfortunately I can't tell you which one I ended up using because I didn't save the document and I don't remember. And I have a bazillion fonts in my font book because of work, it would take forever to go back through and figure it out. Anyways, I was doing this at home, where I don't have a printer, so I did just free-hand it onto a piece of paper and it took a few tries to get it right.

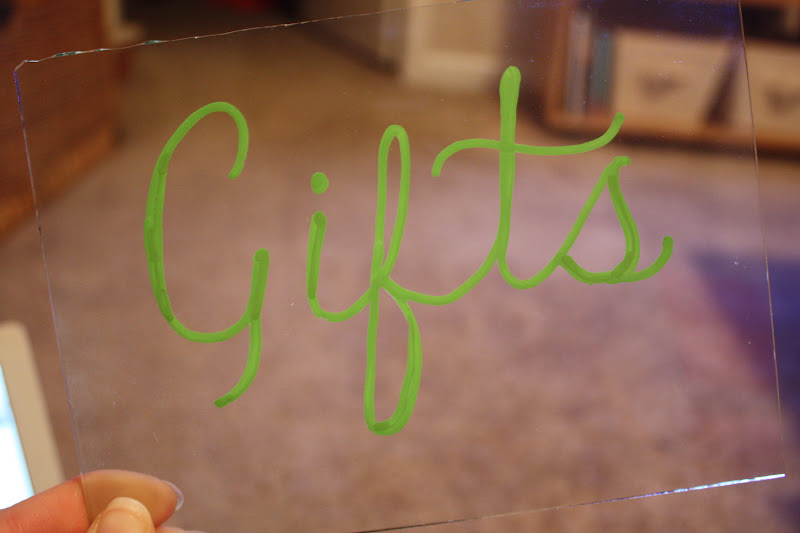
Step 3 - Trace it. I cut out my pattern and taped it onto the glass to secure it before tracing, making sure both sides of glass were clean and smudge-free first! I used two different brands of paint markers, both of of which I got at Michael's.


I had never used these brands before, and I actually liked the Sharpie brand better. It gave a more solid stream of paint than the craftsmart one. If you compare the pictures below you'll see how the green one is pretty continuous, but with the purple one you can tell where I picked up the marker and started new strokes.

Step 4 - Put it all together! The easiest and best step of all! The pearls were adhesive and Amanda had already put them on. A few were coming loose though so I glued them on with some more Aleene's. I didn't think to get a final final picture at the reception, so we'll just have to use the original one I posted. Hopefully there will be one in the professional pictures!
 |
| The lime green was a bit hard to read unfortunately. |
 |
| And this picture is a tad blurry and has a glare :( |
No comments:
Post a Comment